Tutorial: The Most Important Notes
Keeping It Simple
Your First Blues Lick!

Jamming the Blues Scale

Same Note, Different Places

Put the Most Important Notes Together

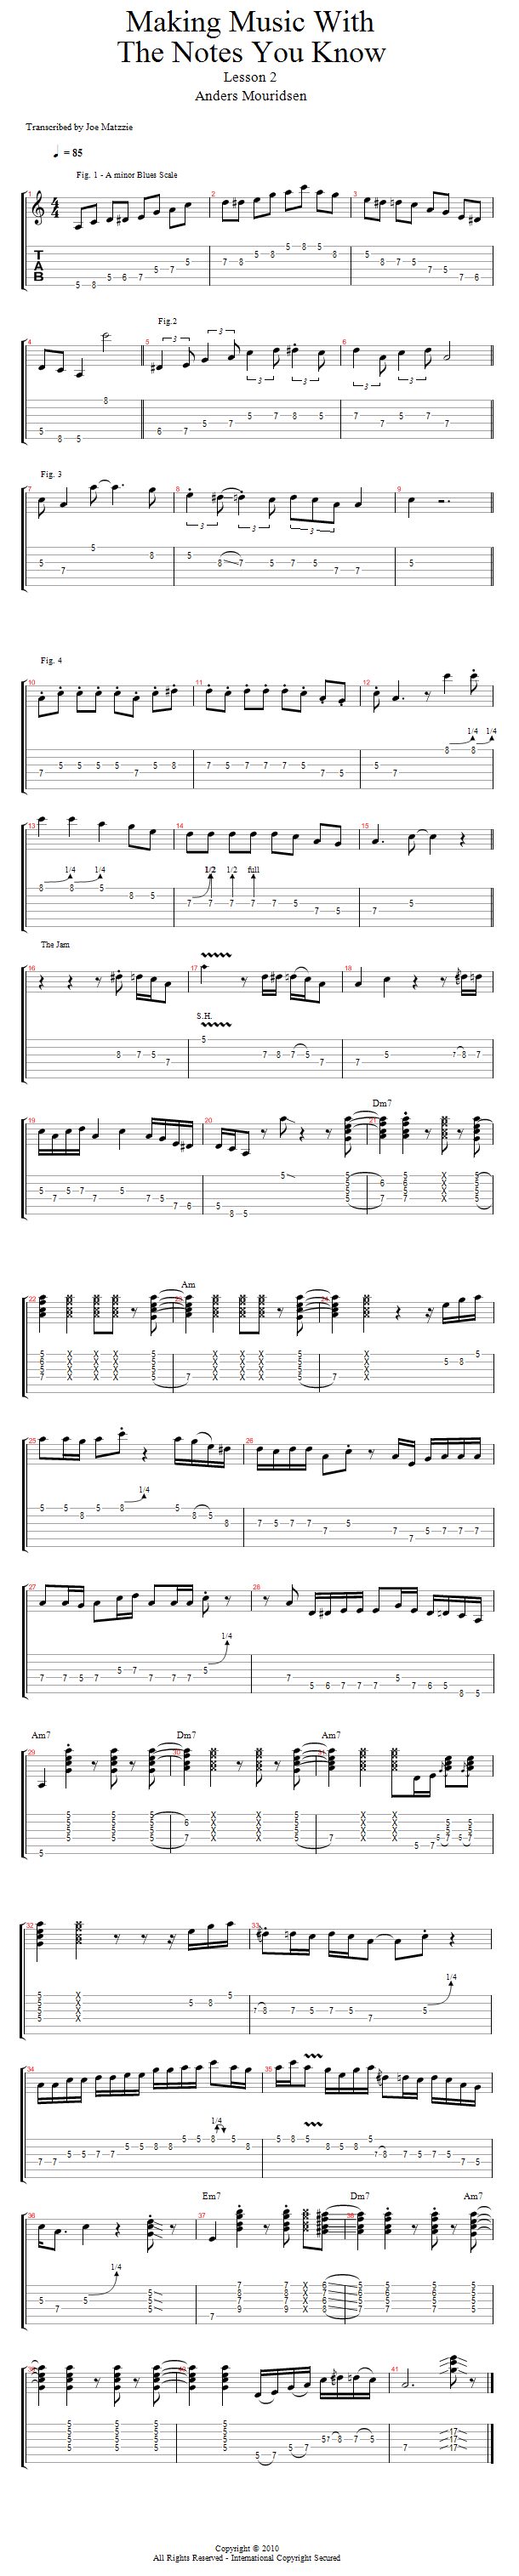
Tutorial: Make Music With The Notes You Know
Enough Talking, Time To Play!
The Good Ol' Familiar Pattern
The Albert King Box

B.B., Freddie, and Eric

Way Up High!

All Over The Place!

Conclusion: Music With Notes You Know
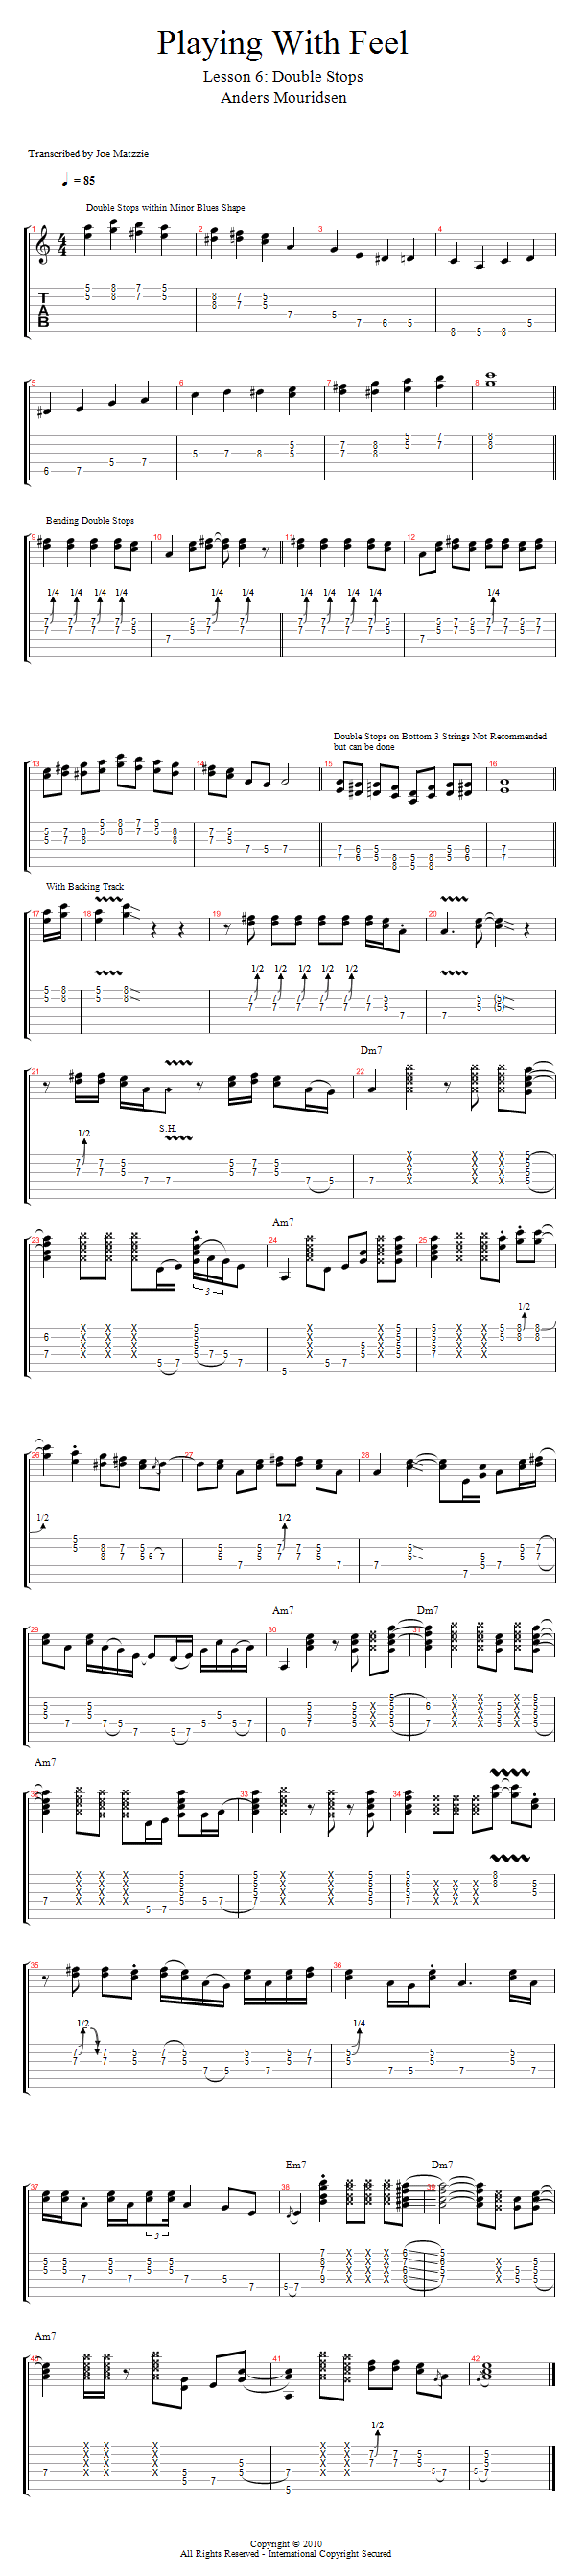
Tutorial: Playing with Feel in Blues
Make Simple Licks More Soulful
Bending Like Singers Do

The Secret Powers of Vibrato

Pull-Off and Give Your Pick A Break!

Hammer On, Play Faster Than You Can Pick!

Double Stopping
Feel: Now Get to Work On It!
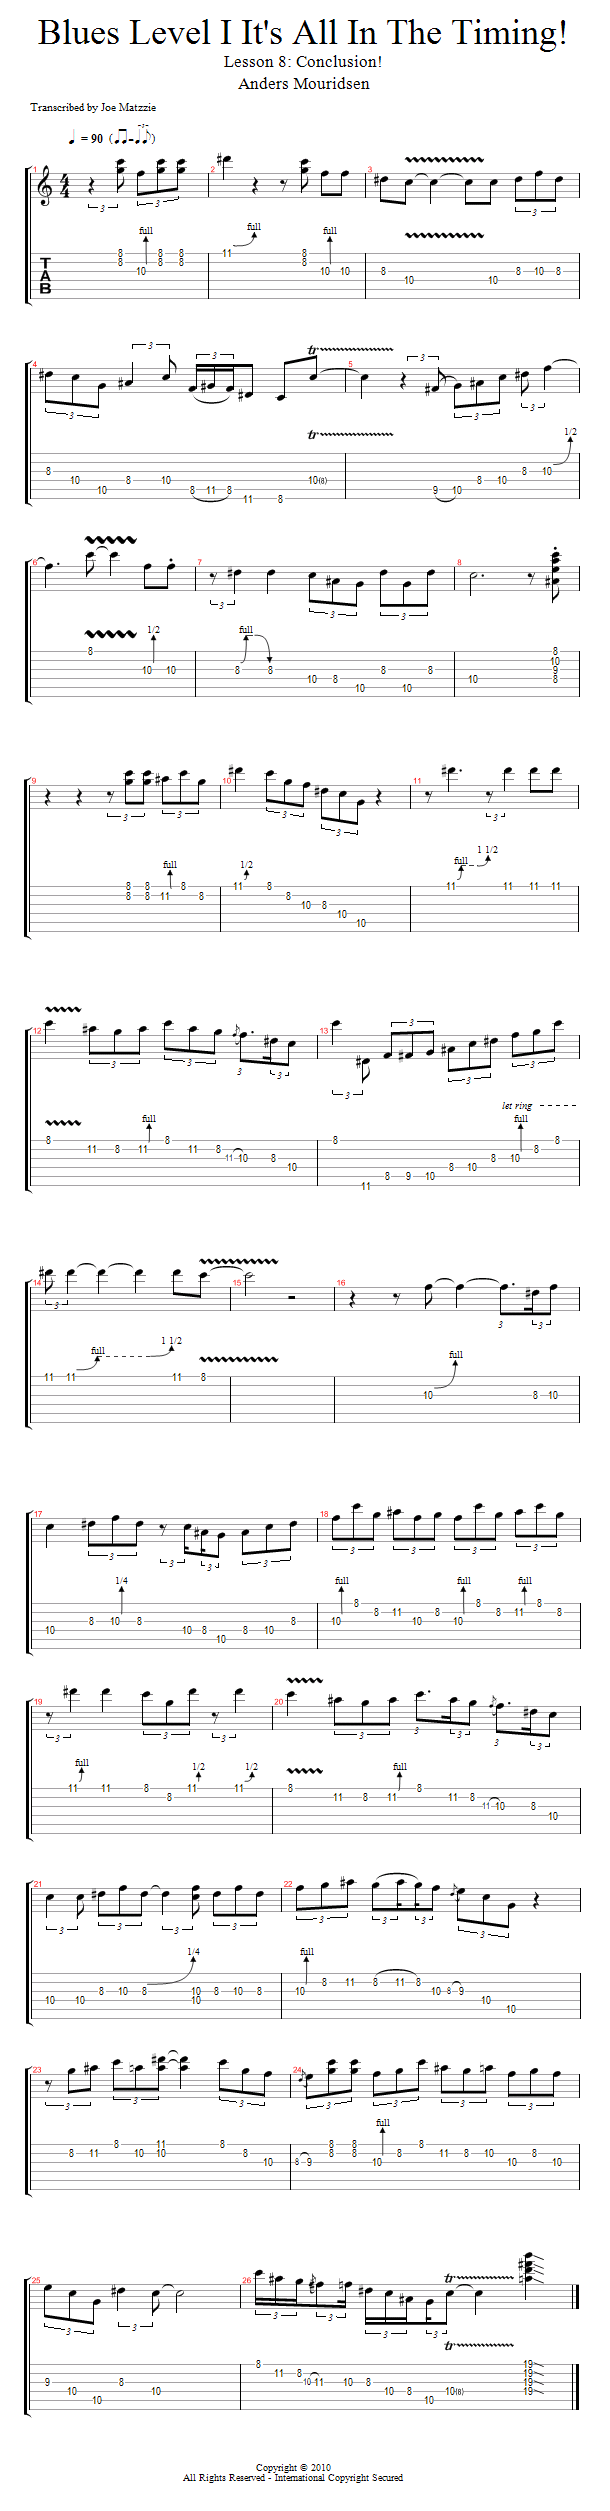
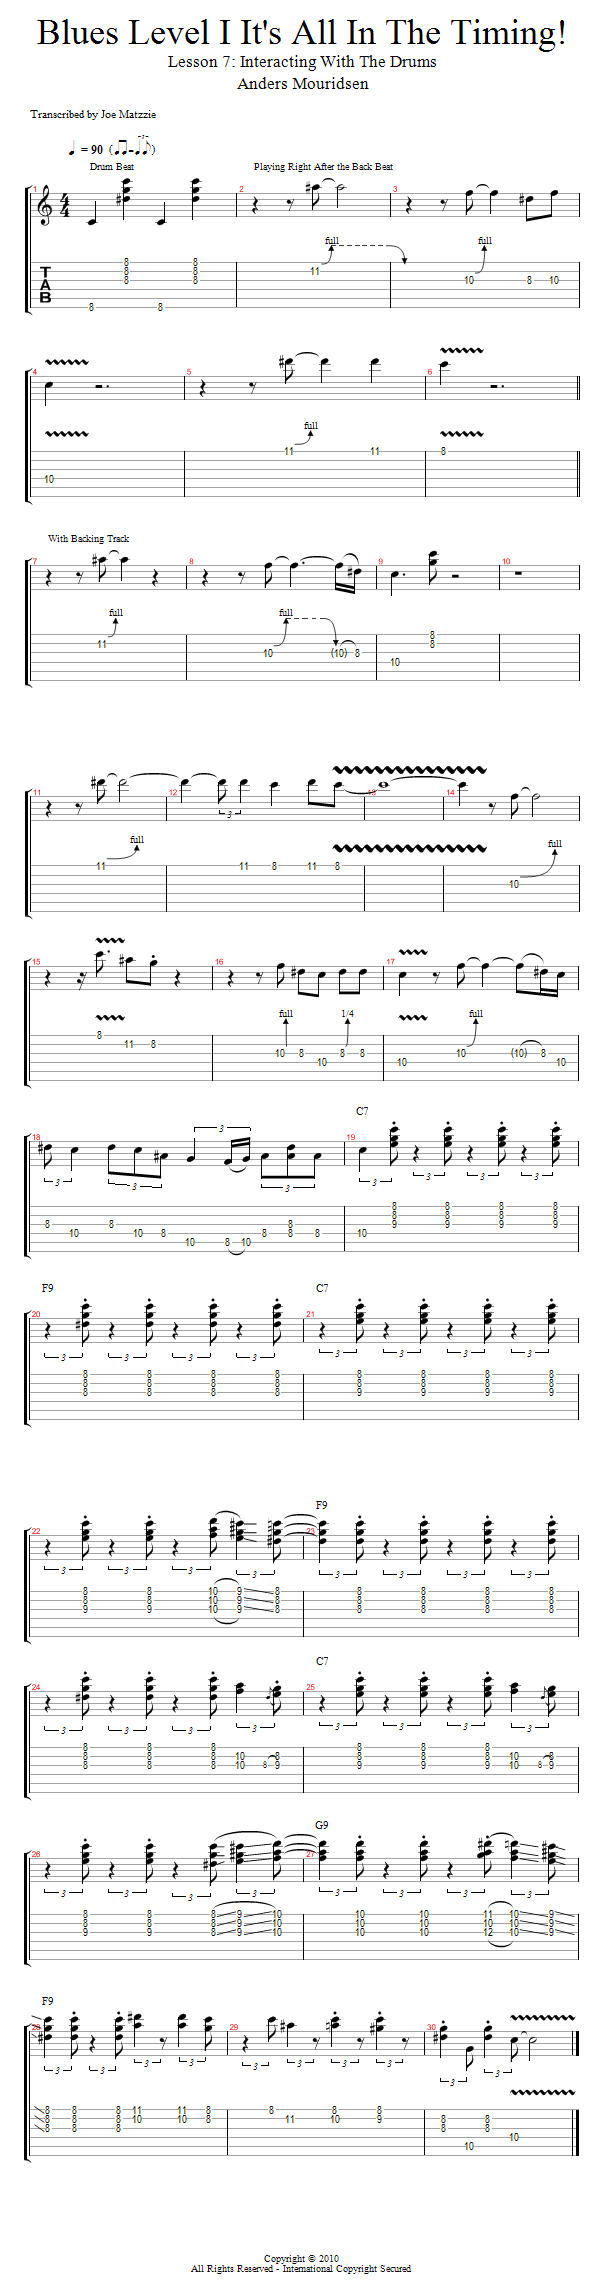
Tutorial: It's All In The Timing
Timing: When To Play The Notes
Slow and Soulful Whole Notes

Timing Your Quarter Notes

Now Time Your Eight Notes

Triplets ala Freddie King

Mixing It All Up

Interacting With The Drums
All In The Timing: Conclusion and Jam